DJI FPV: Beginner's Guide


Introduction
What's good!
Brett Garamella, the Drone Pilot Pro here.
This is a complete beginner's guide to the DJI FPV. So if you just got a DJI FPV drone, I'm going to do my best to get you set up and get out there and start flying.
Setup
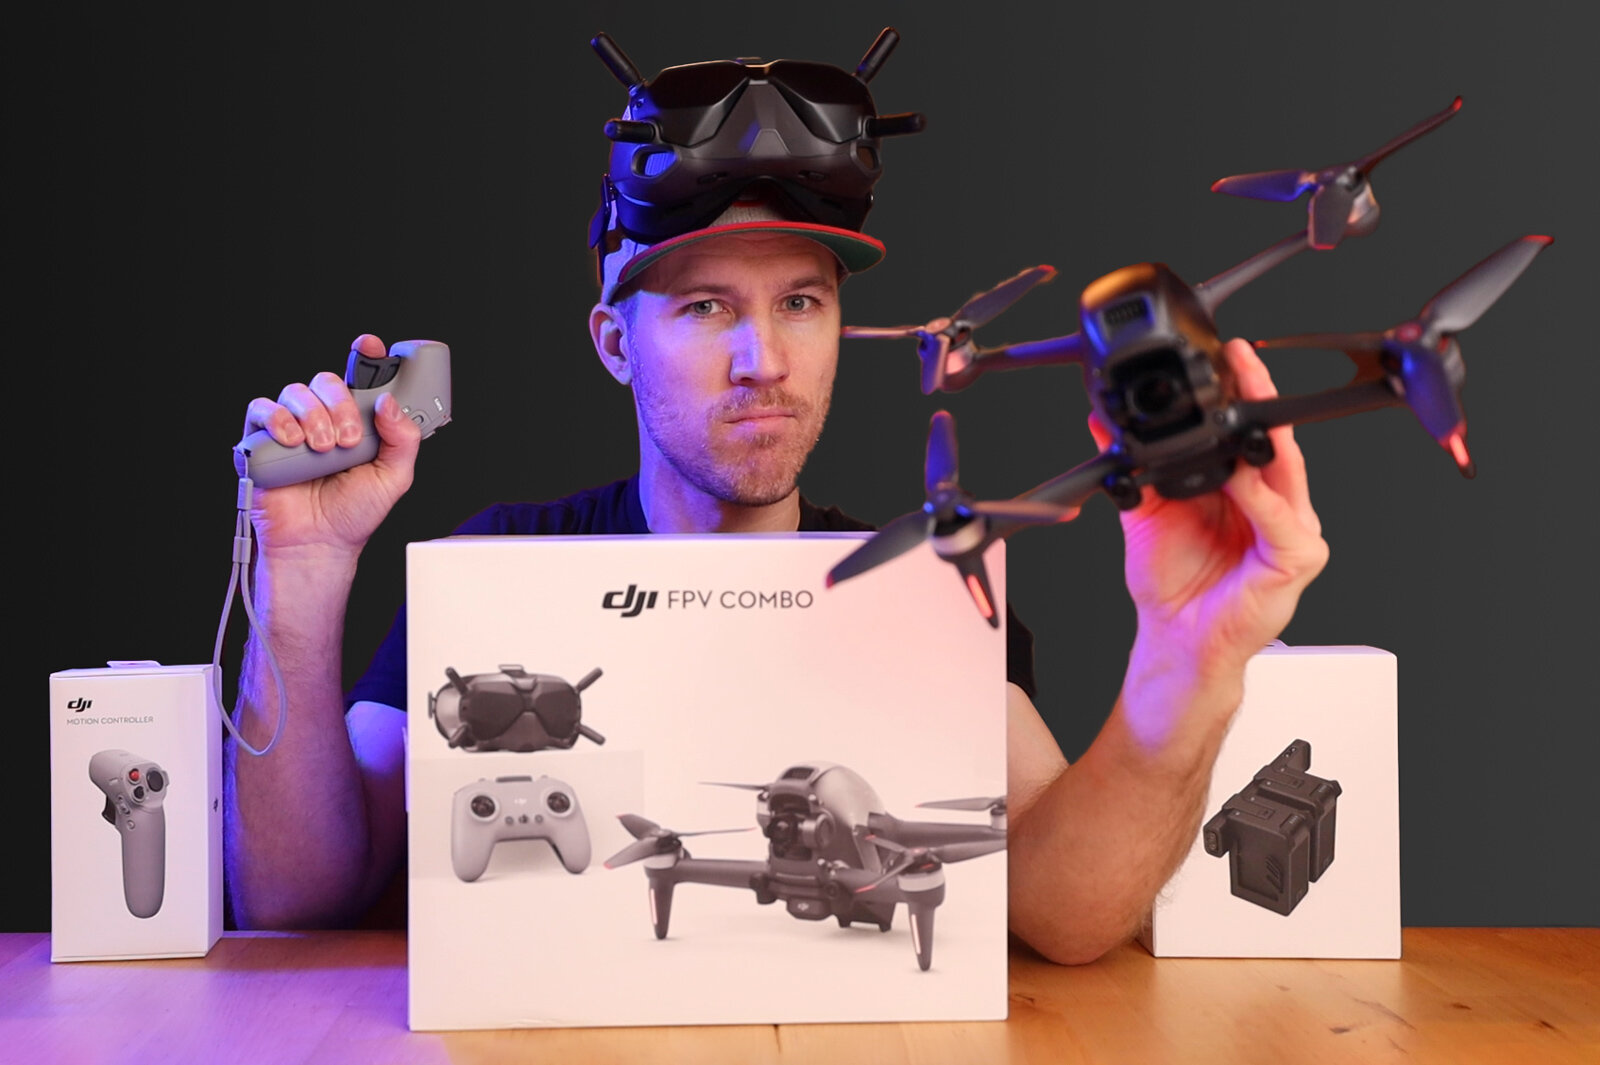
First things first, what I always like to do is just open up the box and take out all the parts and make sure you have all the parts. It's very rare that DJI will forget the parts, but I always like to make sure by putting it out on a table and check it off and make sure they're all there.
The first thing I do when I get a new drone is I charge all the batteries. So first charge the drone battery. Charge the controller and the goggles as well. Make sure you charge them to 100%. You only need to charge one battery for the drone for the next step. But if you got the charging hub, you could charge all the batteries together if you wanted to do that.
Next thing you want to do is download the DJI Fly app, whether you have an Android or an Apple device. I found that sometimes the app is glitchy. So I uninstall the DJI Fly app, and delete it completely from my phone and then I reinstall it. This way it is up to date and everything is running properly. So I'd recommend that you do that.
Next, remove the gimbal cover, and then the film that's on the gimbal camera so nothing happens to the camera when you turn it on. Always have the gimbal cover off when you turn ON the drone. When the drone is OFF, make sure the gimbal cover is on the drone, and this will help maintain the integrity of the gimbal for a really long time. So I always recommend you have that cover on when you don't use it. And if you lose the gimbal cover, don't worry, DJI sells extra gimbal covers on its website. A link to the gimbal cover, other accessories, batteries, etc. are in the description below the video at the start of this article.
Let’s move on to microSD cards. Now the DJI FPV can hold a microSD card up to 256GB. SanDisk Extreme Pro makes great microSD cards. I would recommend 128GB because they will give you enough record time if you decide to buy a 256GB card. Keep in mind, if you crash your drone or something happens to it and you lose that card, then that card is lost. And if it's a really expensive card that can be a bummer. So it might be a good idea to carry multiple cards, maybe multiple 128GB cards rather than one 256GB card. I would also recommend putting a microSD card into your goggles as well. However, the footage on the card inside the goggles is not going to be as good as the card inside the drone. So the drone is going to have much better quality footage than on the goggles. I use the footage on the goggles as a backup in case I crash the drone, I still have the footage. It is a safety net.
Once everything is charged, you take the battery and put it into the drone like this and make sure you push all the way in so it's secure. To turn on the battery, you press it once and then you press it again immediately and hold it down for a couple of seconds and the battery will turn on. You want to do the same thing with the remote controller and the goggles battery. You're going to need the OTG cable, the USB-C end into the goggles, and the USB end goes into a normal data cable. So you need that OTG cable - one end is connected to the goggles, the other end is connected to the cable, and at the other end of the cable, you can connect that into your device. (Click video up top to see visual demonstration of this).
Now before we activate the drone and get into the DJI fly app, you have to make sure the drone and controller and goggles are linked together. If you bought the combo, everything is already linked. However, if you crash your drone and get a new drone, or if you use a different controller or something like this, you're going to have to link them together. So I'm going to show you how to do that right now. And if you just bought the DJI FPV, you can skip this step and go on to the Activation step, which is the next step after this.
Linking
So to link the goggles, you have to make sure everything is turned on. So turn on the drone, the battery, the controller, and the goggles. On the goggles, you're going to see this little small red dot. What I would do is take your hex key, or use take anything that has a small point, and you press down on that red dot. After you press that red dot, you will hear a beeping noise. Grab your drone, press and hold the battery for at least five seconds until you hear that same beeping sound. After about 30 seconds, the goggles will stop beeping and you will see a live view inside the goggles. That means everything is linked and everything is working properly.
Next, you're going to link the aircraft with the remote controller. First make sure the goggles are powered on. To do this, make sure the goggles are connected to the small black battery and it's turned on. Then press the drone battery for five seconds until you hear that beeping sound again. When the battery light moves across sideways, it's ready to be linked. Then press the controller power button for at least five seconds until you hear a beeping sound. Then wait up to 30 seconds and everything should be linked.
Activation / Insurance / Firmware
Time for activation. Your controller is turned on, your drone is turned on, the goggles are turned on, and the goggles are connected to your device with the OTG cable and a normal data cable. Once you do that, press on the DJI Fly app, and you will see the Activate button. Press the Activate button. And then it's just self explanatory. Continue on through the app to activate your drone. If you've already used a DJI drone before, you can put in that email and password. But if you're completely new to DJI drones, then you have to create an email and password in the activation process. Use whatever email and password that you're going to remember. I would recommend you write that down so you don't lose it. Then when you're done, it's going to say activation successful. And this will only take a minute or two to complete.
Now one thing that's really important is you get the DJI insurance for your drone. With a lot of things, I don't recommend you buy insurance. But when it comes to drones, especially a drone like this, you're definitely going to want to get the insurance. Not only will it give you a peace of mind when you fly, but it will also save you a ton of money. If you crash your drone, you can send it to DJI. Then they will send you back a new drone. The insurance covers you for two accidents within the first year. And then you can renew the insurance for the second year, which covers you up to one accident. (Links for DJI insurance are in the video description).
One very important thing is after activation, you only have 48 hours to buy this insurance. If you buy it after 48 hours, it is a real pain. DJI will make you show proof of this and that, and you have to fly your drone and send in a video and it's very complicated. So to make things a lot easier, just buy the insurance within two days after you activate your drone. Now obviously, if you already bought the insurance when you bought the drone, then you don't have to worry that - you already have the insurance, you can now go on to the next step.
Now one thing I like to do with all drones when I first get them, after I activate my drone, and then buy the insurance, turn everything off - the drone, the controller, and the goggles. Then logout of the DJI Fly app. And then once everything is turned off, now turn your drone, the controller and the goggles on and go back into the DJI Fly app. When you go in there, it is a good idea to do this because you could see a firmware update that you need to do on the main screen of the DJI fly app. If you need a firmware update, it will say update or firmware update. Press on that and then wait until it finishes doing a firmware update.
Now before doing your firmware update, make sure everything is fully charged. You don't want to go below 50% because then it will not complete the firmware update and also can mess things up. So just to keep everything good, make sure everything is charged when you're doing your activation and your firmware updates.
Pre-Flight
Now that our activation and our firmwares are all good and our batteries are charged, we're ready to fly. I recommend you go to an area with a lot of open space. Don't go close to buildings or trees or obstacles when you're first starting. Once you get really good, you can do that. For your first couple of flights, it is good to go in open space just to practice, especially if you're new to FPV. Later on, I'm going to show you how to practice with a simulator and then go put those skills into reality.
So go find a safe open space away from people and obstacles. Make sure you have a microSD card in your drone and in your goggles. And like I said earlier, make sure you take off the gimbal cover before turning on the drone. The gimbal cover always needs to be off before you turn on the drone. The propellers are pretty easy to attach. But if it's your first time, it could be a little challenging. One thing to know is there are two types of propellers: just a normal gray propeller and then a gray propeller with a red ring. And what you want to do is match the gray with the gray on the drone, and then the red ring with the little red lines on the drone. Then push the propeller down into the drone, and then with your other hand on the motor, just turn the motor. Or you can just hold the motor and turn the propeller. Both ways work. I always recommend that you make sure all four propellers are secure before takeoff.
Also before takeoff, double check just to make sure your battery is all the way in there, nice and secure. You don't want to lose a battery when you're up in the air. Make sure the four antennas on the goggles are all the way screwed on and secure as well before you take off. Take out the two joysticks on the side, and then screw them into the left and the right part of the controller, so you have your joysticks there. When you place the drone down for takeoff, one very important safety feature is to make sure the drone is facing away from you. So the rear end, or the back of the drone, should be closest to you and the front of the drone should be facing away from you. This will also make it easier to fly right away once you take off. So turn on the drone, press the battery once, and you will see the battery level. Press it twice, holding it on the second press, and the drone will turn on. Do the same thing with the controller.
As of this writing, you can only fly the DJI FPV with the goggles on. However, it is worth noting that you can put on the goggles and attach another cable to a device so that the person flying the drone can see the image in the goggles, and the other person can look at your phone or tablet and go in the DJI fly app and also see what you're seeing. So in the DJI fly app another person can view your flight as well. Because you have to use the goggles for flying, you are going to want to have another person with you to keep track of the visual line of sight with the drone.
Takeoff / First Flight
But right now, let's go over the basic flight features of this drone. On the back of the controller, you want to put it in Normal mode, which flies up to 31 miles per hour. If you put it in the middle S mode (Sport mode), it flies up to 60 miles an hour. In full Manual mode (Acro mode), which is FPV mode, it's total manual control and you can fly up to 87 miles per hour. You don't want to do that right away, so in the beginning stick to Normal mode (N mode) because in Normal mode the obstacle avoiding sensors in the front are on and will help you avoid hitting things. In addition, the drone won't fly as fast, so it is a good way to start.
Then press the joysticks down at a 45-degree angle simultaneously and the propellers will start. Once the propellers start, you can see if any of the propellers are loose as they might come off. So make sure the propellers are fine before you do anything. You do not have to do anything just yet. You can take your thumbs off the controller and just let the propellers turn. Then you are going to want to press the left joystick up to make the drone go up in the air. This drone has a return-to-home (RTH) button, so after the drone takes off about four or five feet, it will record the return-to-home point. So you are all set to go out and fly. You can then press the RTH button whenever you want, and your drone will return to you automatically.
So if you have flown DJI drones before in N mode, it flies almost exactly the same. On the left joystick, if you press up, the drone will go up in the air. If you press down, it will go down. If you press left, it will pan left. If you press right, it will pan right. Now onto the right joystick - if you move the control stick to the left the drone is going to go left, if you move it right, it is going to go right. If you move it up, the drone is going to go forward, and if you move it down, the drone is going to go backwards. So once you are in the air, if you are a complete beginner, take the right joystick and press up - that will make the drone go forward. While you are pressing up, you can take the left joystick and either go left or right, and the drone will turn as you are going forward. These are very basic moves, but the fundamentals are very important. Make sure you practice them if you are a complete beginner so you feel comfortable. The goal is to not have to look at the joysticks and just do it intuitively without thinking.
When you are in normal mode, if you want to stop the drone or make the drone hover, you have to press the left button. Press the pause button with your left index finger and the drone will hover in place. It is not like a normal DJI drone where you just let go and it hovers. So you have to press that button and the drone will hover. Also, the obstacle avoidance is never perfect so it will stop if a wall or some big object is there. But sometimes tree branches and very thin or small objects may not be perfect, so be careful.
Now in Sport mode, I would only do this if you are an experienced pilot and are in an open area because you can fly up to 60 miles per hour. But the front obstacle-avoiding sensors are going to be turned off. Not having those obstacle-avoiding sensors, you want to make sure that nothing is around you that you can hit. If you are a very experienced pilot and you know your limits, then you can fly wherever you want in Sport mode.
Now one really great feature of Sport mode (S mode) is what DJI calls cruise control. Much like you are driving a car, where you have cruise control on the car and it goes automatically, DJI put that feature on this drone. Nice! So to turn on or enable cruise control mode, press the START/STOP button with your right index finger. You press it once, and the cruise control will turn on. And then when you want to turn it off, you press this button again and the cruise control is turned off or disabled. Now when it is in cruise control, it is going to go at the same constant speed, much like driving a car (you do not have to do anything). If you press the right joystick up while in cruise control, the drone will go much faster. Or if you take the right joystick and press it down, that will decrease the speed. So if you want to increase or decrease the cruise control, you take your right joystick and either press it up or down.
ND Filters
Now that we covered the basics of flying, I recommend you use ND filters to make your footage really cinematic and smooth. The ND filters I am using with the DJI FPV are by Freewell, which makes really good ND filters at a reasonable price. And the pack that I have is a four pack, so you get ND 4, 8, 16 and 32, which basically covers you for most shooting situations. I put a link to these filters in the video description.
Free DJI Training / My 7 Secrets
If you want to know how to use these ND filters in creative ways, I made a free 30-minute DJI drone training. And in that free training, not only do I show you how to use ND filters in creative ways, but I also go into my Top 7 Secrets for Flying DJI drones, and answer a ton of questions about drones. So you can watch that free training by clicking on this link.
Goggles
So now that we went over the basics of normal flying in sport mode, I want to talk about the goggles because the goggles are really important. I want to make sure you know everything about the goggles before you go into manual mode. It is also a good idea to know everything about the goggles before flying in normal mode as well, but especially for manual mode. So the DJI FPV goggles, version two, or V2, has four different antennas - make sure these are all screwed on tight and secure. This will give you a good feed into your drone, and a good signal strength. So you want to make sure they are screwed on properly.
Now let's look at the buttons and features on the goggles. On the top right side, you can see the red dot that is going to be your record button. The button next to it, in the middle, is the back button. So to go back, you press that, and then that third elevated button is the toggle button. It is called the 5D button, and I will show you what it does in a little bit. So when you are in the goggles, you can use that 5D button, which basically allows you to choose where you want to go. So the 5D button allows you to scroll through the menu, press the button to confirm, and use the 5D button on the home screen. You can press the button to enter the menu, and you toggle left or right to adjust the screen brightness. You can toggle up or down to adjust the volume. The red record button allows you to take photos or video, start or stop video, or take a photo. When you hold the red button on the goggles, it will switch between photo and video. So if you want to go into video mode, you just hold it. You hold it again, and it goes back to photo mode. To switch between photo and video, just hold the red record button.
On that right side, if you just turn the goggles upside down looking at the bottom, you can see the audio port, the power port, and the link button. As mentioned earlier, the link button is that little tiny red dot for linking your goggles with your drone and controller. The power port is where you connect the cable to your battery. So the goggles are connected to your battery. The audio port is for headphones. So you want to listen to the audio while you are flying. On the other side of the goggles, you have the USB-C port, which you can connect into your device.
Remember, to connect that USB-C port, you need an OTG cable, which comes with the combo. That will connect to the data cable, which will connect to your device. So in the bottom of the controller is an IPD slider, and you could just move this because we all do not have the same vision. Some of us see better than others. So if you just move that slider, it will adjust to your particular vision. One thing I would recommend when wearing the goggles is if you wear glasses, it might be easier if you just wear contacts. Wearing glasses could change that experience. I don't know because I do not wear glasses or contacts. But if you do, I would recommend wearing contacts. And then make sure you have your contacts in when you are adjusting the IPD slider. DJI may come out with corrective lenses for the V2 goggles, but they are not available at the time of this video, but adjusting that slider should do the job.
Remote Controller
Now let's take a look at the remote controller. If we look at the top of it, we can see in the middle, that little thing sticking up is for a lanyard. So you can put a little lanyard around your neck, so you can let go of the controller and the remote controller will dangle from your neck. So that is good to have.
The C1 button is a customizable button. And on the right side you have your power button. Now when you're flying, make sure the antenna is flipped up. That little gray device attached to the front of the controller is the antenna. So you want to flip that up when you are flying to get the best signal strength.
Looking at the controller on the left side, we have our flight mode switch. It switches between normal mode, sport mode, and manual mode. Like I said before, in normal mode the obstacle avoiding sensors are on, in sport mode and manual mode, the obstacle avoiding sensors are off. Normal mode flies up to 31 miles an hour, sport mode flies up to 60 mph, and manual mode flies up to 87 miles per hour. It depends on the wind, how you are flying, give or take, but it is relatively close to that. And then next to that is your flight pause / return-to-home button Below that is the gimbal dial. On the other gimbal dial, you just turn to the left or right with your finger and the camera will go up or down - nice and easy to adjust that. Now one thing to keep in mind with the gimbal dial, the camera does not go all the way down. So you can’t shoot straight down like a normal DJI drone, but it goes down from negative 50 degrees all the way up to 58 degrees. So if you press that pause button once, the drone will just stop and hover in place. It is kind of like an emergency button. To activate the return-to-home button, you press that same return-to-home / pause button. Just hold it down for at least two seconds, and then the drone will return to home. So you press it once real quick, the drone will stop and hover. And if you press it and hold it for at least two seconds, the drone will return to home. I would recommend switching to normal mode when your drone is returning to home because it is safer and easier to maneuver.
The other side of the controller we see the shutter record button, the C2 switch, and the START/STOP button. The START/STOP button can be used to turn on and off the cruise control. So by default, when you get the drone, the C2 switch will just make the gimbal go up and down. But we can change that in the DJI Fly app. So if we go into the DJI Fly app, we are going to click on the settings, then select control, then we are going to go to the remote controller. So you will see this menu, and in this menu, you can change both your C1 and C2 button. You can customize them for whatever you want. Personally, I like the gimbal up button. That is one thing I like to have, and you can change it to whatever fits your flying style.
If we press the shutter button right here, it starts and stops recording. Now you press the shutter button to either record a photo or video depending on which you’re on. If you hold the shutter button down for at least two seconds, it will switch between photo and video mode. So once you are in video mode, if you press that same shutter button once, it will start recording video. If you press it again, it will stop recording video. Then you are going to hold it down for at least two seconds, and it will go into photo mode. In photo mode, you just press it once and it will take a photo.
Manual FPV Mode
Now that we have covered all the fundamentals, we know about the controller and the goggles, it is time to fly manual mode. Now before you fly manual mode, I would recommend you use the DJI’s flight simulator to practice. If you are an experienced FPV pilot, you probably do not need that - you could just go out there and start flying. To get into manual mode, you press that 5D button (toggle button). Scroll down to Settings and then press that. Go down to Control and press that. Then click on Remote Controller. On the menu at the top, you will see Button Customization, and then you are going to go all the way down and you will see Custom Mode. Click on Custom Mode. Then scroll up and make sure that is on Manual Mode, not Sport Mode. So press Manual Mode. Then press Confirm.
Now to fly manual mode, it is a good idea to do a little customization, which will help you get the most out of flying in manual mode. If you are an experienced FPV pilot, this will be very simple. But if you are a complete beginner, this might seem a little annoying or kind of weird, but trust me, it is worth it. In the back of the controller, you are going to flip up that plastic part and open up that cover, where you will see F1 and F2. Next to that F1 and F2, there are two small screws. You are going to want to adjust these screws. So with the DJI FPV combo comes a little hex wrench, or I call it called a hex key. Take that hex key, and with that F1 screw, you are going to tighten it up by tightening that screw. The left joystick is not going to go back to center; it is not going to be as spring loaded. It is going to just go down, and that is going to help give you more control flying in manual mode. So when you tighten the F1 screw, it increases the resistance of the joystick. But when you tighten the F2 screw, it decreases the resistance of that joystick. Experiment with it. Move it back and forth to get it just the right way you want it. That is your throttle stick that will be fine tuned for your particular flying style.
Virtual Flight App
The flight simulator that DJI created is a good way to practice. First, download the DJI Virtual Flight app on your phone. I recommend practicing on the DJI Virtual Flight app before you fly in manual mode if you have no experience flying FPV drones. It is better to crash virtually than in real life. However, if you are an experienced pilot, you do not really need to do this.
In this app, there are three different types of training - you have skills training, free flight, and time trial. In that first category (skills training), practice flying with your normal controller in manual mode, and the tutorial in the app will show you what to do. You have to keep practicing to get good at it. Then if you go into the free flight section (the second section) you can fly in all different environments. You can practice in different environments that you might see in the real world. This is really helpful because it makes it more realistic and will help build your confidence before you actually fly outside in the real world. And then if you are the type of person that likes speed and drone racing, you can go into the third section called time trial, which is basically a virtual drone racing course. So one way to get really good at virtual training is to make it as realistic as possible. Put on your FPV goggles while you are in the app, and connect your controller to the goggles, and then you can start practicing. If you have your drone observer (visual observer) next to you, they can hold the device and connect the device to the goggles and see the DJI fly app while you are flying virtually. So you can control it with the remote and look at it through the goggles while a friend is watching your skills. To do this, you obviously have to turn on the remote controller and goggles, connect your goggles to your device with the USB-C port. You can use the right joystick and then you can press the START / STOP button to select what you want.
So once you have practiced to the point you feel confident, then you are ready to fly in manual mode. Probably the most important button in manual mode is that pause button, or the return-to-home button. When you press that pause button once, the drone will pause. If you hold it down, the drone will return to home. Keep that in mind in case you panic or something bad happens to stop the drone and make it hover, or to make the drone return to home. I would also adjust the return-to-home height to higher than any obstacle near you, so when the drone returns home, it does not hit anything. Also, when you return your drone to home, switch it to N Mode (Normal Mode), so the obstacle avoiding sensors are on.
You can cancel the return-to-home button if you feel like you know where the drone is and you can safely land it on your own. To do this, press that pause / return-to-home button once. Now you are ready to fly in manual mode. You want to hold the left joystick (throttle stick) all the way down. Then you are going to press the START / STOP button twice to start the motors. Then you are good to go. You have done all the training, so let her rip!
Lost Drone
Now you may be thinking, what happens if I crash my drone, and I don't know where my drone is? Luckily, DJI has thought of this and they have ways to find your drone. It is not 100% guaranteed, but it has saved many drones. And I am sure it is going to save many people's drones out there who are flying in manual mode.
So if you crash and you do not know where your drone is, this is what you do. If you still have a first person view, then you can go into the DJI Fly app. Click on your Profile on the home screen. Then click on Find My Drone. Try to zoom in on the map to see if you can see your drone. If the battery came out or the drone is not on, then what you are going to want to do is go to the DJI Fly app in the upper right hand corner and click on that. You are going to want to go into your flight log and look at your last flight and try to find the coordinates on the map, and see if you can go find it on the map. Go to those coordinates and then start looking for your drone. This is another reason why it is important to have a visual observer with you and to really practice and get good so that you do not crash. It is sort of inevitable that some people will crash in manual mode, especially flying up to 90 miles per hour. So hopefully this will save your drone and give you a peace of mind.
Motion Controller
The DJI motion controller will make it a lot easier to fly in FPV mode because all you have to do move it like a joystick left and right and so forth. This is an oversimplification, so let’s get into the details. Like your normal controller, it is always good to charge it up 100% and then also do firmware updates. You can do both of those things through the USB-C connection in the bottom of the controller. To see the battery level on the joystick, look at the lights on the top. Like everything else DJI, you press it once, and then you press it again a second time and hold it that second time and it will turn on. DJI calls that trigger in front an accelerator. So as you pull the accelerator, the drone speeds up and goes much faster, and as you let it out, it will slow down. If you want the drone to stop flying forward, you just release the accelerator all the way.
Then near the top you have three buttons. The red button is the lock button. Then right below that is the mode button. Then on the right hand side you have the brake. So when you press the lock button, the drone goes up for takeoff. The brake button is just like the pause button on a normal controller. So when you press the brake, the drone will just stop automatically and hover just like the normal controller. You hold down the brake button and the drone will return to home.
So that mode switches between the different modes - normal mode, sport mode and manual mode. On the left hand side of the joystick, you have the gimbal tilt slider and the shutter record button. The tilt button just makes the gimbal go up and down or makes the camera go up and down. So just move it up to go up, and down to go down. It is kind of like the dial on the remote controller. The record button, which is that red dot, press it to record and stop recording video, and also to take photos. To switch between photo and video mode, you hold that red button down. So pressing it records video or takes a photo, but when you hold it down, it switches between photo and video. So the motion controller is great to have, but you are going to have to link it up to your drone, so to do that just like before, hold down the battery until those lights start going across back and forth. Then on the motion controller and the right hand side, you press the power button and just hold it down until you hear it beeping. Then at the top of the controller, the battery lights will go across in a line just like the lights on the drone. You know you have linked the controller to the drone when the beeping stops, usually takes about 10 to 30 seconds.
To begin flying, you are going to turn on your drone and turn on your goggles. Now connect your goggles to your mobile device. To do that, you need that OTG cable. If it asks you for activation or firmware updates, make sure you do that. You want your firmware to be all up to date here, and you just follow the prompts like we did before in the very beginning of this video for firmware updates.
You want to make sure you have a good GPS signal before you start flying. In the lower right hand corner, you can see that little GPS signal, which says the number 20. You want it to say at least 9 or higher. Once it is 9 or higher, you are good to take off. To start the motors, press the lock button twice and then press it again, holding it down and then the drone will take off. Like I said before, you hold down the accelerator and the drone will go forward. You can move the joystick up or down, and in your goggles will be a little circle directing you where it is safe to fly. So if you see that indicator, you want to move the circle to match it, and then the drone will fly to that point, avoiding any obstacles.
You can fly forward and start accelerating when that circle matches up and it changes color. So basically the drone will move in the direction that you move the controller. You move it left or right, it is going to pan left or right. If you do not want to move your arm, you can just move your wrist. When you press the accelerator, the drone goes forward and then you turn the controller, the drone will start turning in that direction, so it is flying forward and making a turn. Now if you want to turn really fast in a 90 degree or like 180 degree angle, you are going to want to turn your whole body with the controller 180 degrees. So you actually have to turn your whole body. It might be a little bit of a workout.
Replace Parts
Now we're going to get into replacing and repairing parts. This is a beginner's guide, so we are not going to go super in-depth, but all of the necessary repairs and replacements that you will need to make, we are going to go over right now. So before you do any replacements or repairs, make sure you have all the necessary parts. I have included a link to these parts in the video description at the beginning of this article. I would recommend watching that video as it will be easier to follow along.
Make sure you use your hex key, which comes with the combo. To replace the top of the drone (top shell), the first thing you want to do is take off the gimbal cover. Then you are going to want to get out your hex key. And you are going to unscrew the four screws in the front of the drone. So you will want to take off that front piece. Then you are going to take off these two screws on the left side and the right side. The shell just loosens up and you pull it off. Now be careful, you do not want to damage anything. So when you are doing all of these replacements, make sure you take extra care.
Then we put this funky lemon color on the top. Make sure you hold it wide because it snaps in there. Then just put it in there nice and snug. Then you are going to tighten the screws on the left side and the right side. Then you are going to put in the front frame and use the hex key to screw in the four screws.
Next, you are going to replace the gimbal. To change the front gimbal, you have to take off that front piece and the top shell. That is the first thing you want to do. So you have to unscrew that front piece again, those four screws, pull that front part off, and you are going to see the gimbal there. You have to loosen those other screws right here. There are four screws around the gimbal. Right here, we want to loosen those up, take those off, and then we are going to use our hex key to loosen those silver screws right here and lift this little thin metal piece (silver metal piece) off, not the end of the gimbal. There is a little cable connector - make sure you attach that, but be sure not to damage anything. Do this with two hands, and make sure to take extra care when doing this. Then put the new gimbal in there and connect it, or you unconnect it right there. With those cables, you just put it back in there. You put that silver metal plate down and screw it in with the two screws. You can see we are going backwards now. Tighten the four screws, so the gimbal is secure. And then you are going to put on the front piece and tighten those screws. Now you are going to want to put on the shell and screw in both sides - left and right as we did before. And then you are also going to put in that front piece and screw in those screws, those four screws as well. So on your quad, you have four different landing gear right here. So if you want to change your landing gear, you are going to have to go down there, take your hex key and just unscrew those two screws. Take the main plastic part out first. And then when you look inside, you are going to see these two little cables connected to the panel. You want to disconnect the two cables to the panel very, very carefully. And then you want to take the new panel and connect that. Then you are going to want to put in that new plastic piece, the new landing gear, and tighten the screws.
So basically you are not only replacing the landing gear, but that little panel is for the LED lights. So usually if you crash, you might damage both of these. You want to make sure your lights are working and the landing gear is also working. One item that might help your drone from becoming damaged as easily is arm bracers, which give it a lot more stability and support. To install the arm bracers, you need your hex key. They snap in on both sides. You line them up and put them in. You start with your drone upside down and then flip your drone right side up. And then you put the little buckles on the side right there. And you have to make sure that the hole for the screw is lined up when you put it in the buckle. Then turn the drone upside down and tighten the screw. Take the other bracer marked with the letter R and repeat these steps.
Another way to keep your drone safe is to attach a propeller guard, which is sold separately. The propeller guard is very discreetly labeled LF and LB. So you are going to take a LF and a LB, and then you can attach them together. Then you line up the guard with the drone, and you put the drone in there. Then you just snap it on and you are good to go. Now you are all set up and ready to go.
Drone Gear Guide

I recently updated my free Drone Gear Guide, which gives you my recommendation for all different drones of all different budgets, as well as accessories, software, and other tools to make you a better drone pilot. You can download that free guide by clicking here.
Fly Like a Pro!
~ Brett